
|
Cross-Site Lookup
|
|
|
|
|
COVRI Cross-Site Lookup Column augments standard Microsoft® SharePoint® lookup
functionality by allowing retrieval of information from any site within site collection,
applying list view filtering to retrieved data. It delivers a powerful function
of searching over lookup list.
- Supported lookup data from SharePoint lists in all sites within site collection
- Powerful function of searching over lookup list by using a Picker Dialog
- Supported lookup data from subfolders
- Filtering retrieved data using existing list views
- Single and multiple lookup for standard mode and using Picker Dialog
- Ability to add and edit lookup items on the fly
- Supported default values
- Supported Datasheet view, including edit mode
- Conversion among "COVRI Cascaded Lookup", " COVRI Cross-Site Lookup" and standard
SharePoint "Lookup" column
Microsoft and the Office logo are trademarks or registered trademarks of Microsoft
Corporation in the United States and/or other countries
|
Default SharePoint Lookup supports only lookup within the same site; hence lookup
data from another site cannot be used. COVRI Cross-Site Lookup allows users to refer
to a list from any site in site collection.
“Use filter by list view” option in column settings allows user to select some specific
items (filtered by desired criteria).
For Large lists search using standard SharePoint lookup is not very efficient and
COVRI Cross-Site Lookup with Picker Dialog helps to resolve this issue. One can
search/filter data in picker dialog and find the required item efficiently.
Using COVRI Cross-Site Look Up
1. There is an Orders List with columns Name, Date of Order and Customer Location
column which is a COVRI Cross-site Lookup column to City column is Cities List.
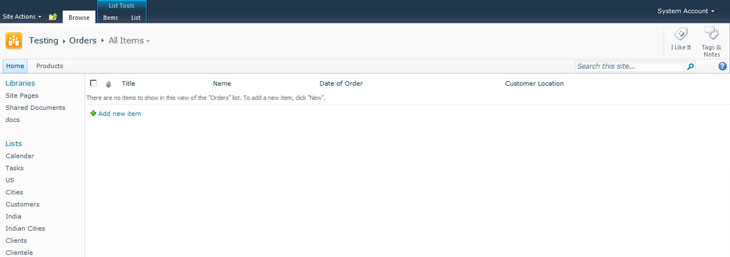
Figure 1.0
2. Check the corresponding boxes to configure the column for allowing multiple values,
picker dialog and use filter by list view options. Select CCity columns from the
Available list columns section and click on Add button (Figure 2.0).CCity column
is added in the Show in picker dialog box (Figure 2.1)
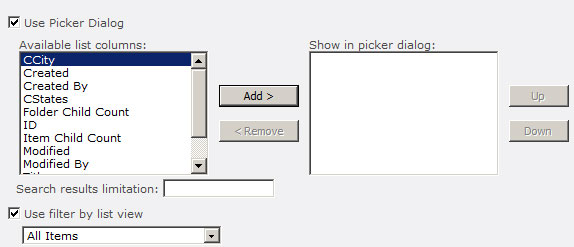
Figure 2.0
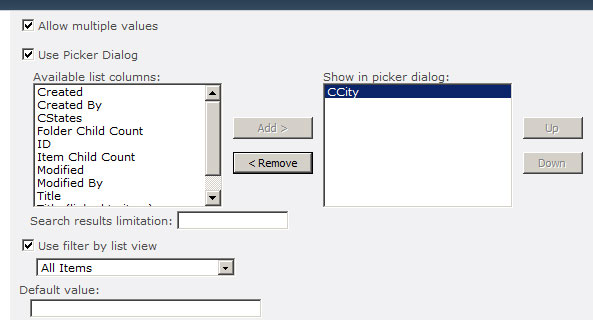
Figure 2.1
3. In order to allow items addition to the source list using separate list New Item
form, Click on corresponding radio button (Fig. 3.0) and click OK to create the
column
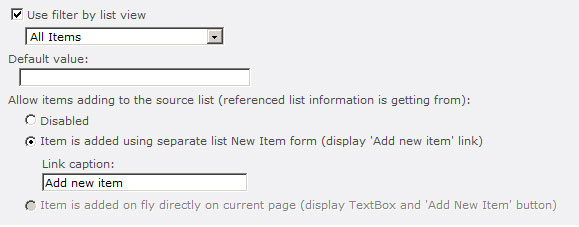
Figure 3.0
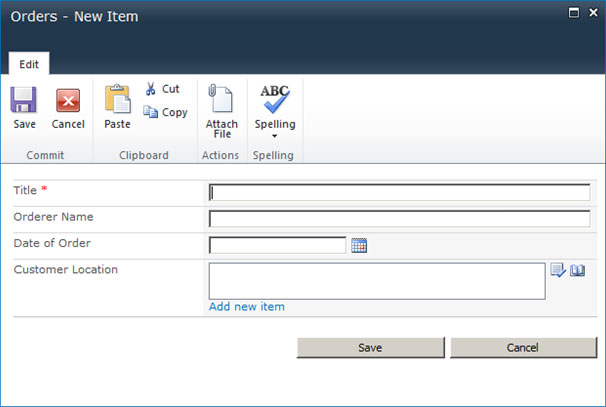
4. In the Orders list create Add a new item (Figure 1.0) and new dialog opens as
show in Figure 4.0
Figure 4.0
5. In order to allow items addition to the current page on the fly , uncheck the
Use filter by list view option and Click on corresponding radio button (Figure
5.0) and click OK to create the column
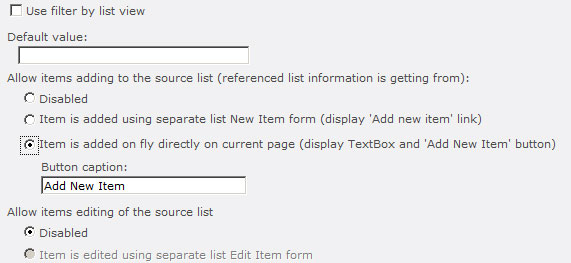
Figure 5.0
6. To add item on the in the Orders list create Add a new item (Figure 1.0) and
new dialog opens as show in Figure 6.0. Enter item name (Washington in our case)
and click on Add new item button, the new item is added in the customer location
list ( Figure 6.1)
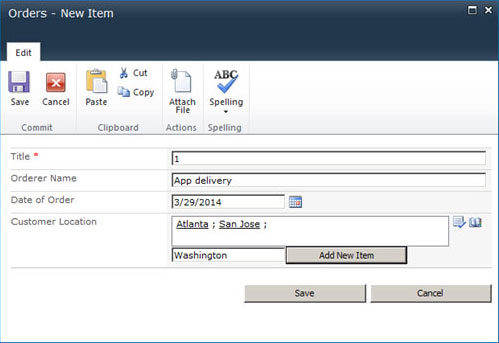
Figure 6.0
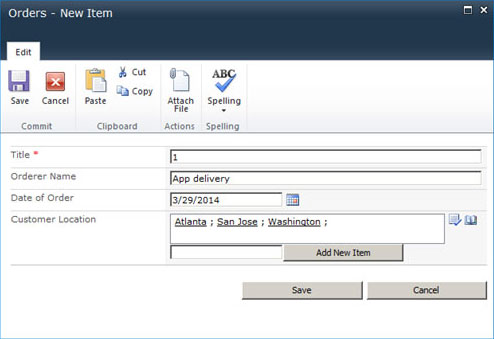
Figure 6.1
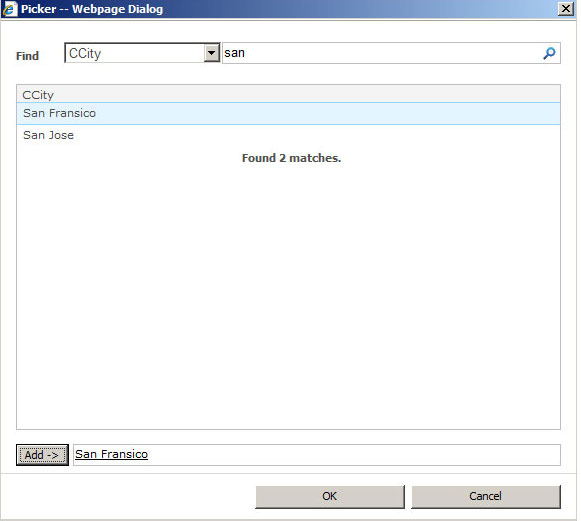
7. To retrieve item using picker dialog, click on the picker dialog icon as shown
in Figure 7.0. A new Dialog box open (Figure 7.1) with the field(s) set for picker dialog.
Enter a search key word for item and search. The search results retrieve items matching
the keyword. Select the item and click on Add button. Finally click ok to add item
to the list.
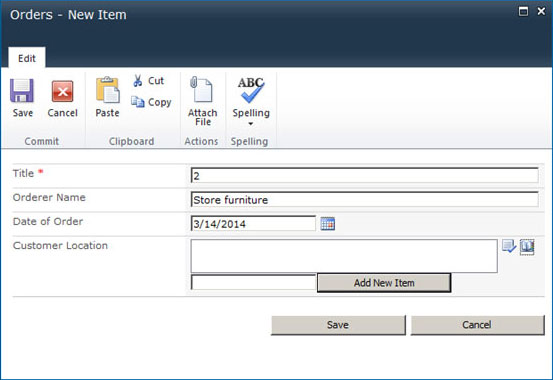
Figure 7.0
Figure 7.1
System Requirements
For SharePoint 2010:
|
Operating System:
|
Microsoft Windows Server 2008 x64
Microsoft Windows Server 2008 R2
|
|
Server:
|
SharePoint Release:
- Microsoft SharePoint Foundation 2010 or Microsoft SharePoint Server 2010
- Microsoft .NET Framework 3.5
|
|
Browser:
|
Microsoft Internet Explorer 7 or greater is recommended for Advanced Administration
features
Mozilla Firefox supported
Chrome supported
|
|
|
|
Product History
|
|
|
Cross-Site Lookup Version 1.0
released on 28th March 2014.
|
|
|
|